


Spray Finishing Problems: Fisheye
If you’ve loyally followed my four-part mini-series on spray finishing problems, you’ll find the fourth and final part interesting: fisheye.
As with the previous three parts, I hope it will be useful to everyone, both seasoned pros and beginners alike.
In this one, as I’ve consistently done throughout this mini-series, I’ll use my three-step problem-resolution process to help you avoid encountering this problem. Let’s get started!

1. Identifying Fisheye
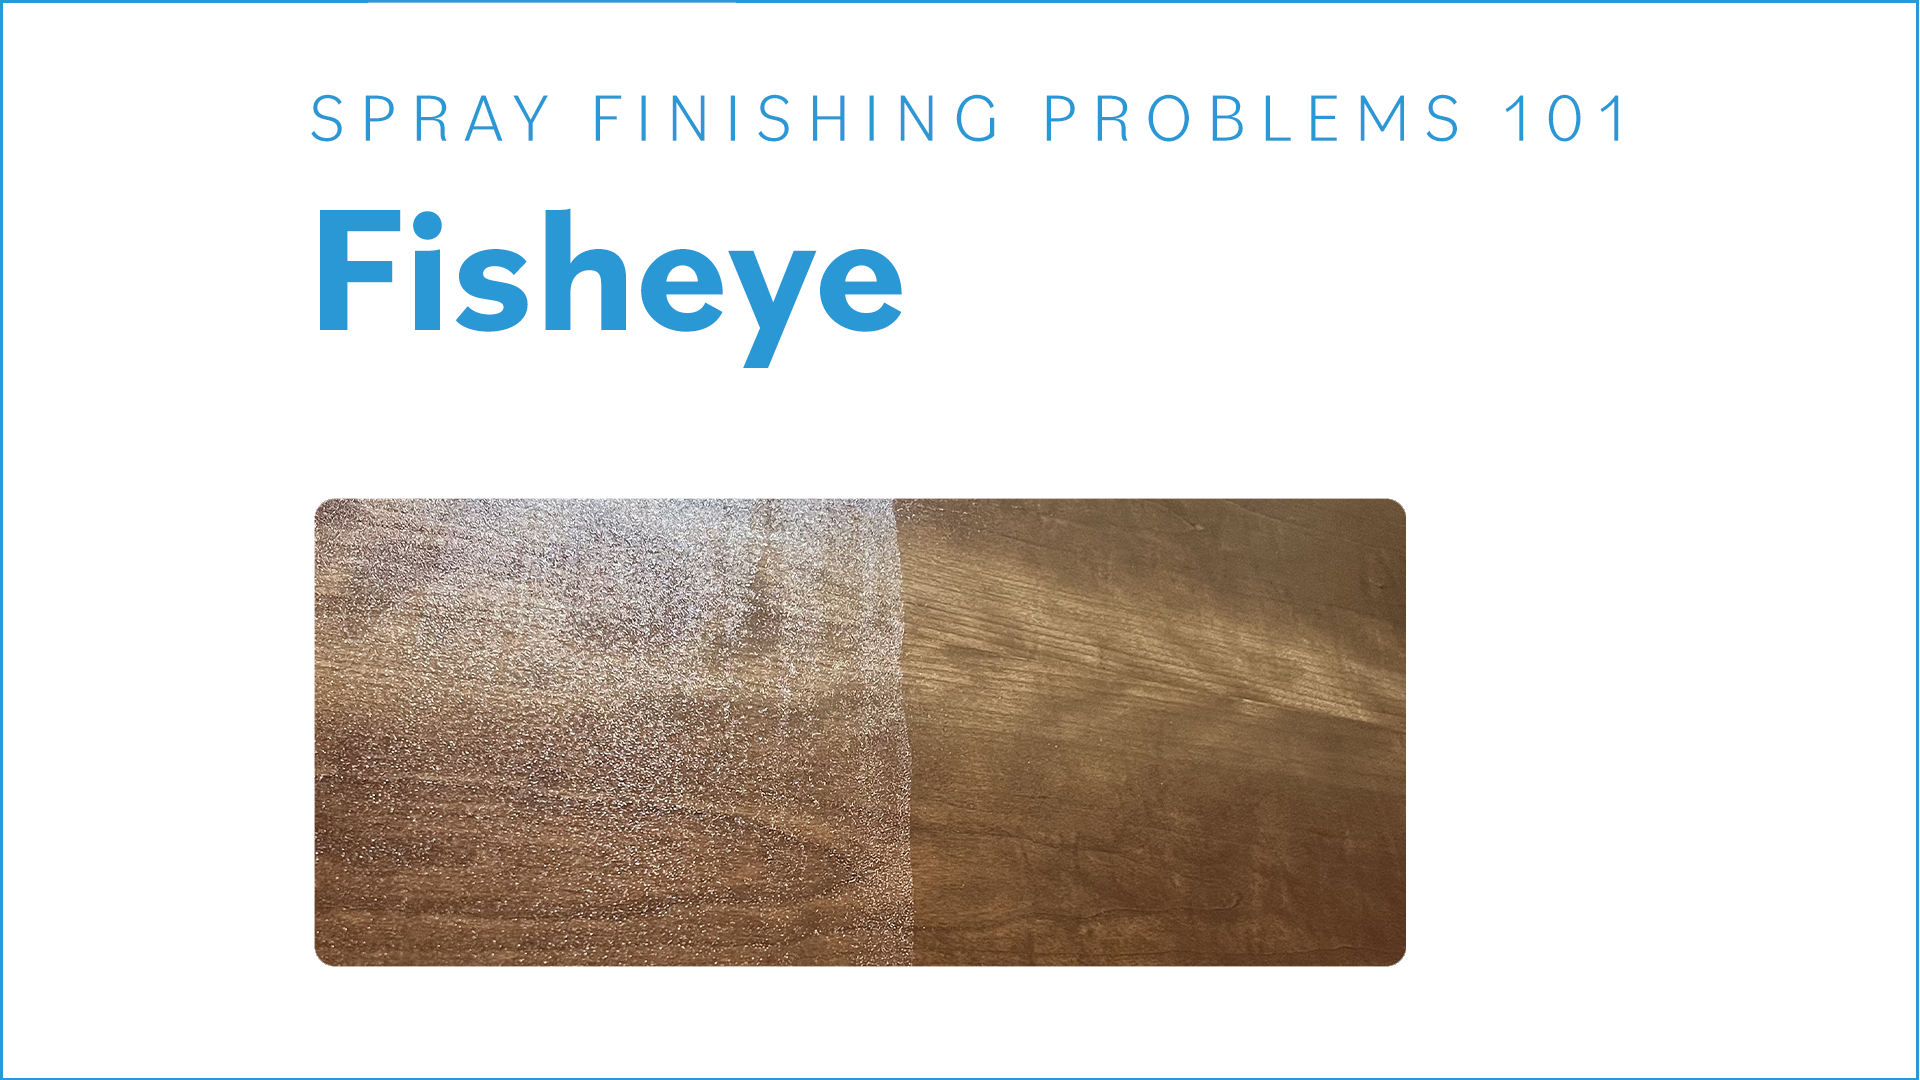
Fisheye is incredibly easy to spot. You can see it from across the shop floor, even in a large shop.
From further away, it will appear to be small craters. But if you look closely, you’ll see each ‘eye’ has rounded edges and a sunken center section.
2. Dealing with Fisheye
Now that you’ve identified the problem, it’s time to address it. As with all the other finishing problems, the best approach is to sand it back with progressively finer grits until you’ve completely eliminated the issue and achieved a uniformly flat finish.
To save you time and effort in sanding, begin with the least aggressive grit size that does the trick, gradually working up to the grit recommended by the finish manufacturer. Ideally, you’ll have a smooth surface before reaching the seal coat, or even better, before uncovering bare wood.
Don’t worry; you can address these challenges before you proceed with the topcoat application – and this time, the right way.
3. Understanding the causes of Fisheye
Fisheye problems are typically caused by contamination present when you apply your finish. This contamination can result from various products and needs to be completely eliminated before you can continue with your finishing process.
Let’s discuss two of the most common sources of contamination:
Inadequate Curetime: Mixing Oil-based and Water-based Products.
If you’ve applied an oil-based product and didn’t give it sufficient time to cure before transitioning to a water-based product, you might encounter fisheye issues.
THE SOLUTION:
I’ve personally used hemp oil on walnut wood for years to permanently “warm up” the appearance of the finish, for as many years as I can remember.
Start with sanding the bare wood. Typically it begins with P80 grit and gradually moves up through the grits to P180. Liberally apply the oil generously using a rag or foam brush. After a few minutes, repeat until the wood doesn’t absorb any more oil. Wipe off any excess oil from the surface.
Allow for 5 to 7 days for the oil to soak fully into the wood and the surface to become dry to the touch. Using a fan to gently circulate air after it’s left to dry for a few hours will significantly accelerate the drying process… but don’t rush it.
After this curing period, you can continue with the remaining steps of your finishing process. Which, for me, involves applying a coat or two of a water-based sanding sealer, followed by sanding with P600 grit. Finally, I apply my topcoat, usually with three coats.
There’s no need to sand between these topcoat layers unless you encounter runs, drips, or any unexpected mishaps in your fresh finish.
A Solvent-based Tack Cloth.
Those accustomed to using solvent-based products might be familiar with using a traditional tack cloth, a cloth with a very thin varnish-mineral spirit mixture applied to it. This cloth is used to wipe away sanding dust before applying the next coat of finish.
However, even a small trace of the varnish-mineral spirits mixture can contaminate the surface, and it must be completely removed before you can proceed with applying your chosen water-based finishing product.
THE SOLUTION:
Typically, this involves generously wiping off the surface with denatured alcohol, followed by sanding away any of the contaminants. Be prepared to repeat this wiping and sanding process several times until all the contaminants are gone.
Summary
I hope you’ve enjoyed this mini-series on finishing problems. (I know I’ve enjoyed writing it!) And as always, let me know if you have any questions or comments on this topic, or if there are other topics you’d like me to write about. I’m here for you.