


Spray Finishing Problems: Striping
If you’ve been following along on my four-part mini-series on spray finishing problems, you’re in luck!
This time I’ll focus on one of the easiest problems to avoid: striping. Although it’s easy to avoid, I have a feeling that everyone, including seasoned spray finishers, will discover a few things they may not be aware of, or may simply have forgotten over the years.
And just like my first two articles in this mini-series, I’ll use my three-step problem resolution process to help you steer clear of this issue. Here we go!

1. Identifying Striping
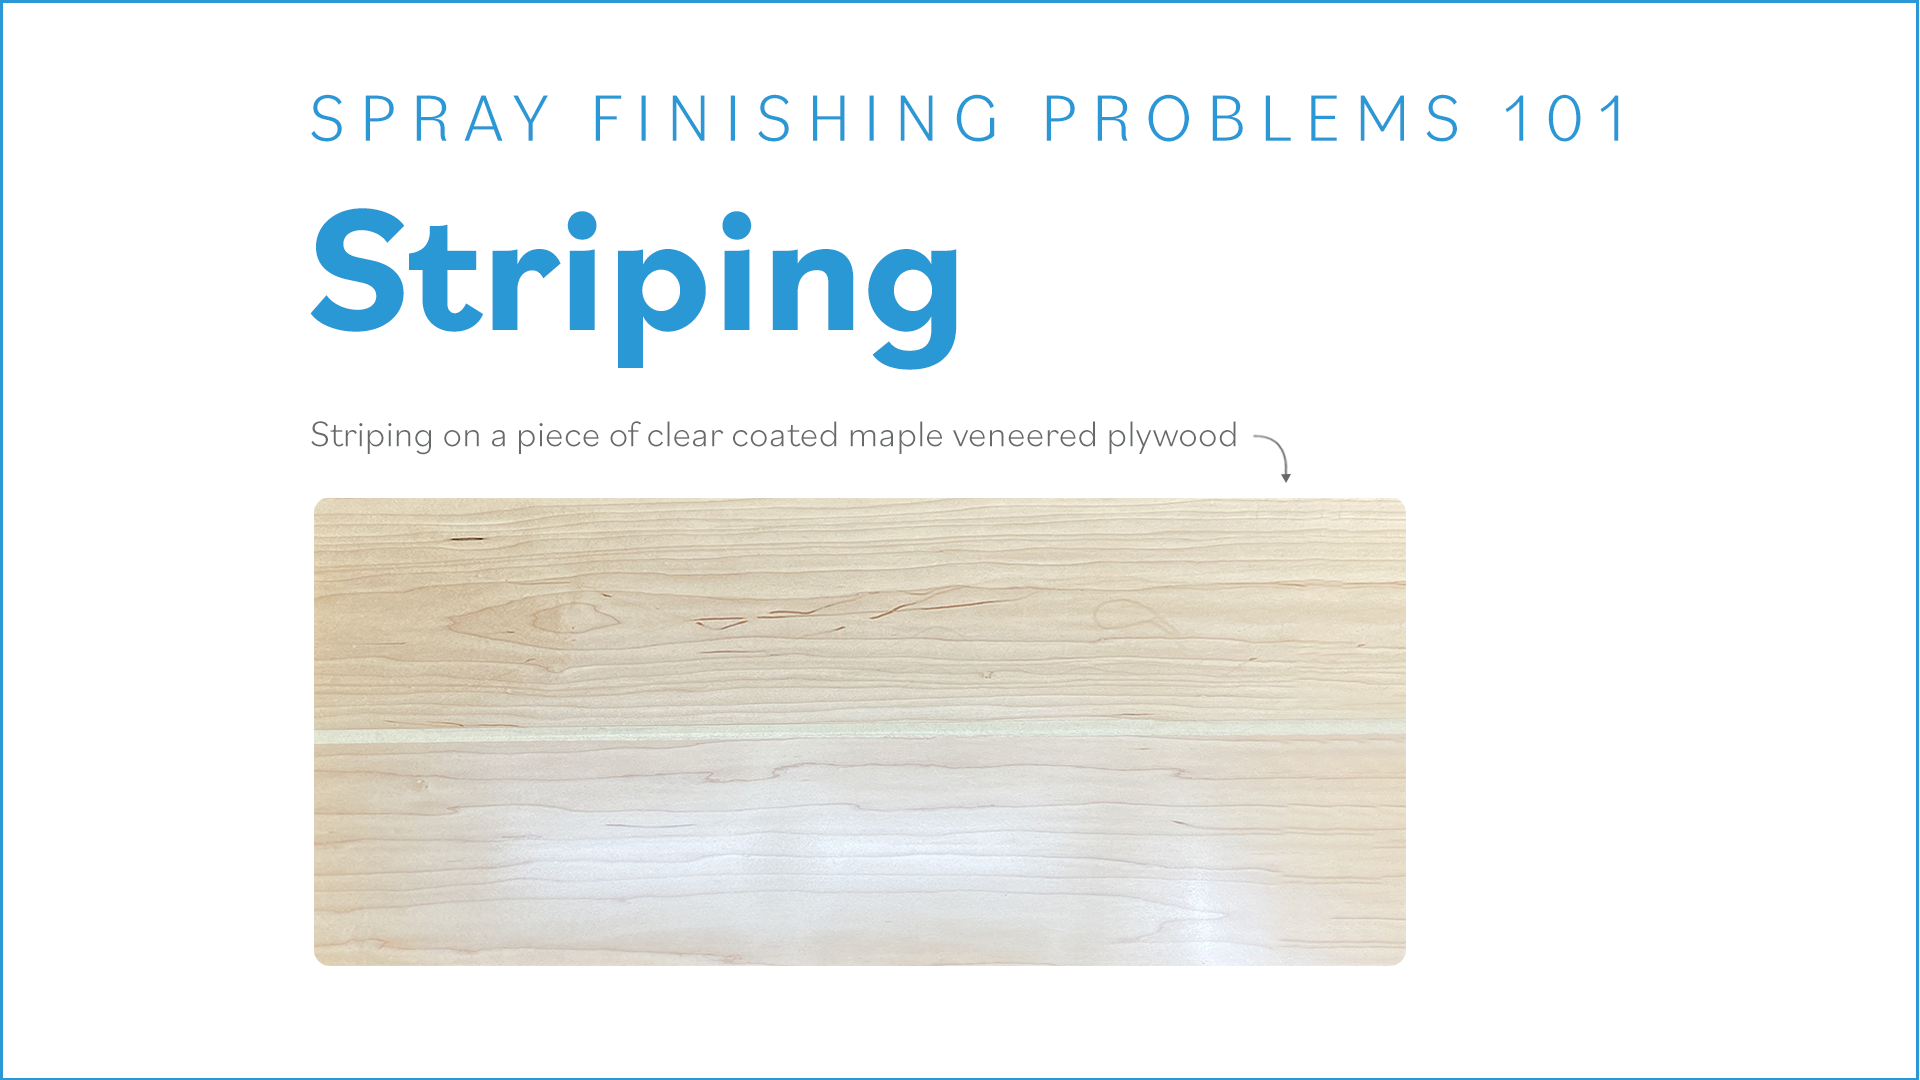
Striping, also known as “bands” or “holidays”, appears as rows with finish on them and sections that appear drier or have less finish on them. If you notice that, then you’ve got a striping problem.
2. Dealing with Striping
Now that you’ve identified the striping problem, it’s time to address it. As with many finishing problems, the best approach is to sand it back with progressively finer grits until the striping has been removed and the finish is uniformly flat. To save you sanding time:
always start with the least aggressive grit size, and gradually work your way up to the pre-topcoat grit size the finish manufacturer recommends.
Ideally, the striping will be evened out before you reach the seal coat or, worst case scenario, bare wood. Don’t worry, you can deal with either of those issues before continuing to lay down your topcoat – this time, the right way.
3. Understanding Striping
There are 3 causes of striping – inadequate overlapping, incorrect fan width, and spray distance.
Failing to overlap adequately between passes.
In most cases, the culprit is inadequate overlapping between each pass. With most finishes, you should be aiming for a 50% overlap. That means after each pass you should advance your spray gun to approximately half the fan width before continuing. Anything less than that could run you into a striping problem.
And pay attention to how things are working out as you move along. If you can see indications of striping creeping in, reduce the amount you advance your spray gun on each pass until things are looking better. If you’ve just finished your last pass and things still don’t look right, try a technique called “cross-hatching.” Rotate your workpiece 90 degrees and lay down passes perpendicularly to your first coat.
Incorrect fan width.
As with the other finishing problems, improper spray gun adjustment may also be the cause. But in this case, the fan pattern is too circular, so you’ll need to widen it up by properly adjusting the settings on your spray gun.
Holding the spray gun too close.
There’s an ideal distance for holding your spray gun above the target surface. If it’s too close for the overlap distance you’re doing, it’s likely to cause striping. Again, by watching closely how things are coming along as you spray, you’ll be able to dynamically correct this.
Summary
Stay tuned for the fourth and final installment of my spray finishing problems mini-series, focusing on fisheye. As always, let me know if you have any questions or comments on this topic, or if there’s other topics you’d like me to write about. I’m here for you.