


Dealing with the Dreaded Overspray
Picture this: you’re looking to invest in a spray finishing system. You do your research and find out that High Volume Low Pressure (HVLP) spray systems and spray guns are among the most efficient ones on the market. And that’s because they generate so very little overspray, with the majority of the finish ending up on the workpiece. So why then is it that when you tackle you first project, say, an end table, the top feels smooth as a baby’s bum, but the leg and the lower shelf are rough as sandpaper?
In this article and its companion YouTube series of videos, I’ll explain why this has happened and how to deal with it. Let’s delve into “the dreaded overspray”.
What is overspray?
Any finish that doesn’t land directly on the piece (and believe me when I say that there will always be some) and is left floating in the spraying area and starts to dry out is called overspray. And if that overspray somehow makes its way onto the piece which you’ve just sprayed, it can spoil the finish… and that’s not what you want, is it? Everyone knows that having a good spray system – one that doesn’t generate a lot of overspray in the first place – is a great starting point. But knowing what – and what not – to do when spraying your furniture or cabinetry can make all the difference in keeping this from happening.
In this article and the accompanying YouTube video series, I’ll lay out my 5 most important strategies to help you deal with overspray and get the “wow” results you’re striving for.

Strategy #1: Proper Work Support
Of all the many ways to support workpieces while spraying, the two most common are: placing them on a work support; and, suspending them on a hangar-like system. Because the former is the one most widely used, let’s focus on it.
Most overspray problems relating to work support are caused by using the wrong size of support. As you can see in the above photo where I’m getting ready to spray a drawer-sized piece, I’ve set up a turntable mount that’s narrower and shorter than the workpiece itself. I have two other mounts as well as a few different shop carts, each sized to correctly accommodate different workpieces.

Similarly, a wire closet rack as in the above photo, can be an excellent choice for supporting small pieces – even those so small that they’d be otherwise blown off their mount.
In these ways, any overspray will bypass the mount instead of being bounced underneath the piece or back onto the surface as it would be if it was sitting atop a large table or overly large mount. Size matters!

Strategy #2: Adequate Airflow
For those of you spraying without the benefit of a high-performance exhaust system, there’s a good likelihood that instead of being drawn away, any overspray drifting about the area will settle back onto your freshly-sprayed piece. To overcome this, place an auxiliary fan (see the above photo) aimed towards your spraying area, set to a medium or low speed. I also use this system when spraying pieces that extend beyond the mouth of my open face spray booth, where airflow is marginal.

Strategy #3: Spraying in Enclosed Spaces
Spraying the inside of cabinets (being simulated by the cardboard box in the above photo) poses its own set of overspray challenges. Any overspray can become trapped in the confined space and settle back before it can be drawn away by the airflow. So, whenever possible, remove the back of cabinets in preparation for spraying. This will enable the airflow to draw away any overspray. You should also reduce the possibility of overspray in the first place by reducing the amount of air coming into your spray gun and turning down the fluid volume until your spray gun is adjusted for optimum atomization.

Strategy #4: Finish Prior to Assembly
The above photo depicts my 4th strategy for dealing with overspray: whenever possible, spray individual parts of your cabinetry or furniture prior to assembly. Even taking the top off a table or cabinet can make a huge difference, as you won’t have to worry about any overspray floating down onto the rest of the cabinet while you’re spraying those parts.

As shown in the above photo, another idea is to mask off areas you’ve already finished, freeing you from having to worry about any overspray contaminating them.

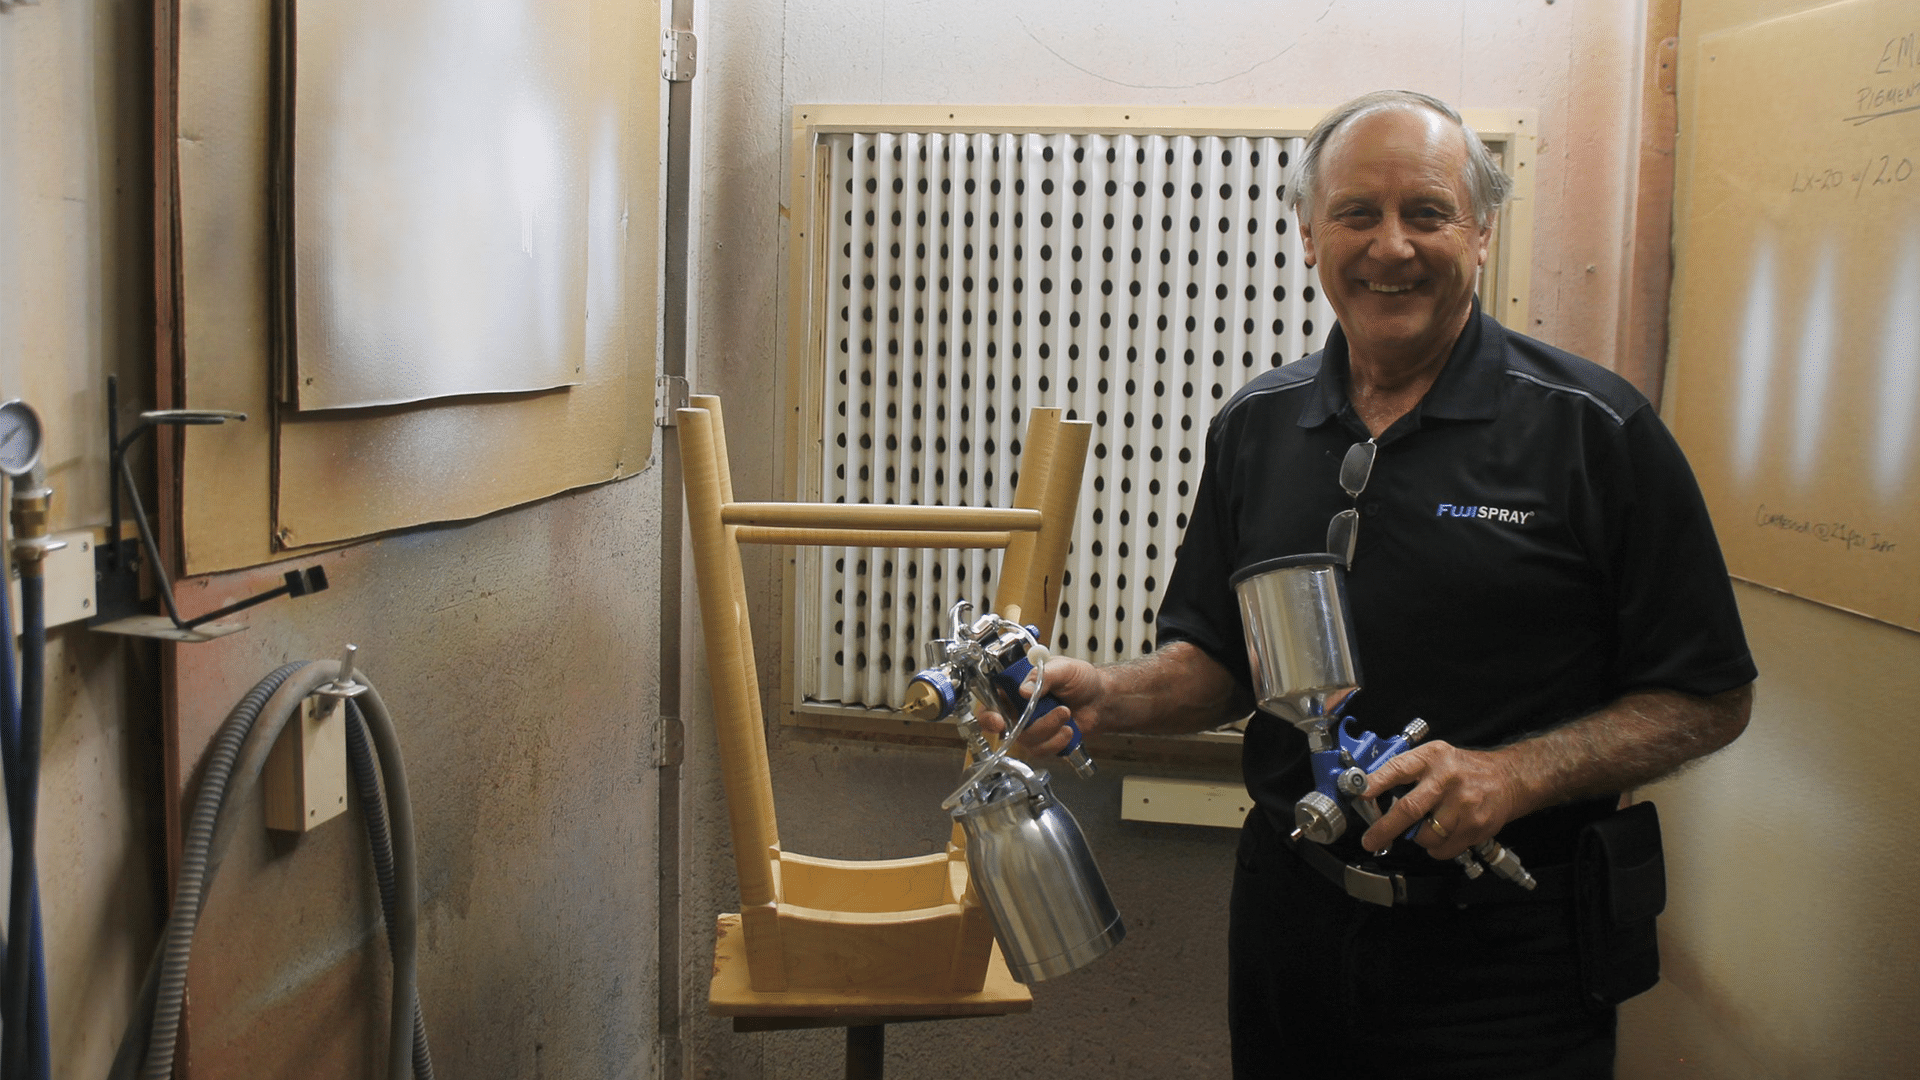
Strategy #5: Spray the Most Important Parts, Last.
I always teach my students to identify the “money” areas (those that the client will see or touch most) of their pieces, then spray them last. Using the above stool as an example, I’ll spray the inside of the legs and spindles first, as those areas aren’t as important as the top of the seat or outside of the legs. That way, any overspray that gets onto the inside while I’m spraying the seat top or outside of the legs won’t affect the overall desired effect on the “money” areas. And to keep from bumping your spray gun or hose into difficult-to-reach areas such as the inside of the legs, mount a smaller cup on your spray gun, or consider using 3M’s PPS system.
Summary
I hope that this article and the companion YouTube video series have given you a better understanding of overspray and how to deal with it. If you have any questions or comments about this topic, or if you have ideas for future articles, feel free to let me know. I’m here for you.