


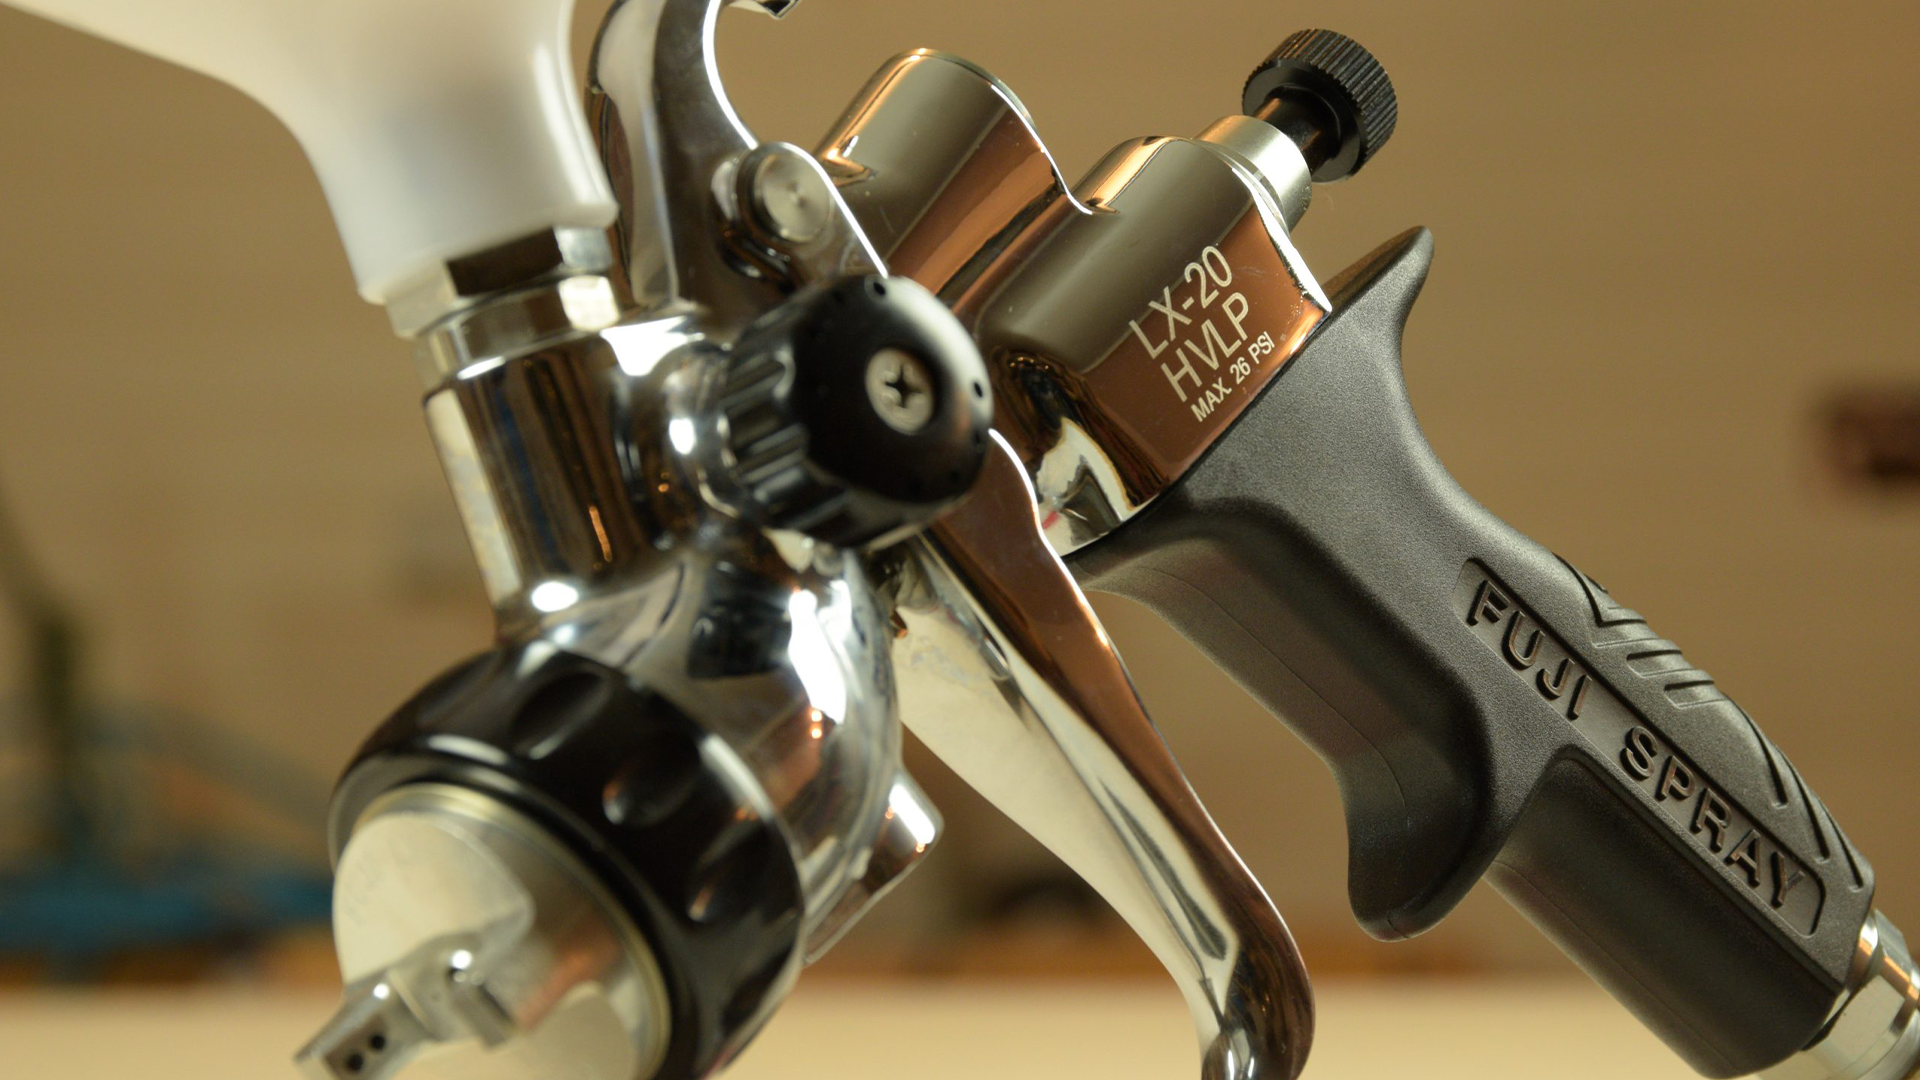
Spraying Shellac with an LX-20 HVLP Compressor Spray Gun
If you’ve ever sprayed a woodworking finish with a quality HVLP gun like the LX-20 from Fuji, it would be hard to go back to a paint brush. In fact, it would be hard to settle for a lesser spray gun either, because the controls and mixing chamber of the LX-20 are refined to a new level. I’ve always had good luck spraying lacquer, but I have struggled in the past to spray shellac. I realized that it wasn’t my choice of topcoat… it was my spray finishing equipment. The high performance LX-20 HVLP gravity feed spray gun changed all that.
Select Your Needle and Nozzle Set.
Pick a matching needle and nozzle set that matches the wood finish you intend to spray. The LX-20 HVLP has 1.2mm, 1.4mm, and 1.7mm sets to choose from. I’m spraying a small furniture project with shellac Seal Coat, which is a fairly thin product compared to lacquer or polyurethane. I selected the 1.4mm set, and tested the spray pattern on some cardboard. The spray pattern showed that the finish was being finely atomized, and the spray pattern looked very consistent. If you are experiencing trouble spraying, especially if your wood finish doesn’t seem to be finely atomized… try stepping up your needle / nozzle set one size larger. Another option is to thin your finish slightly.
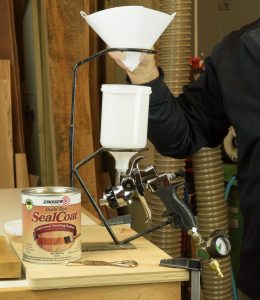
Strain Everything that Goes Into Your Gun.
It’s perhaps the #1 rule in spray finishing. Strain everything that you pour into the gravity feed cup of your LX-20 spray gun. I mean everything.
Pouring denatured alcohol or lacquer thinner into your gun? You better have a strainer in place. I have seen rust and debris in the bottom of metal cans that will clog the filter in your spray gun if you fail to strain the finish properly. It simply prevents so many problems before they even start. It’s an absolute must for the best possible results when spray finishing.
 Plan to Succeed.
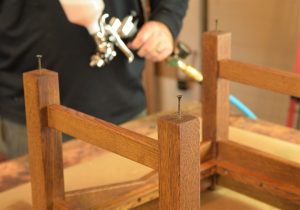
Take the time to plan how you’ll spray a piece of furniture. What order will you spray in? What section should you start with, and what section should you apply last? I usually place drywall screws in each leg that act as standoffs, and allow the finish on the bottom of the legs to fully dry. Here, I start with the piece upside down, and spray the underside of the rails and legs that will be difficult to access once the piece is right side up. Then flip the piece over, and spray in a sequence that makes sense for your project.
 Inside / Underpinnings First.
Start with the inside of the frame, including the bottom edges of rails. These are very difficult to access once the piece is flipped over. Notice how the gravity feed cup on my LX-20 is only half way full. This is a very small project compared to a large chair or cabinet, and won’t require much shellac to apply the topcoat. By filling the fluid cup only partway full, I’ll avoid common problems like a blocked cap vent. Use one hand to operate the spray gun, and the other to manage the compressor hose. There’s nothing more frustrating than letting a hose drag on your project, and spoil a freshly sprayed wood finish.
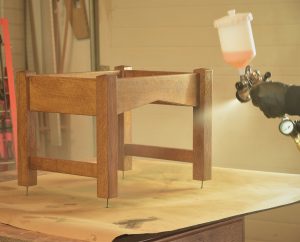
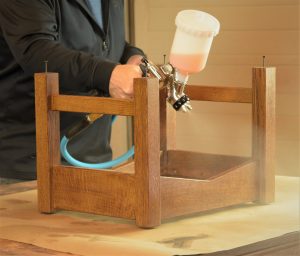
Vertical Legs and Posts Are Next.
With the project turned upright, take a moment to adjust the nozzle cap of your spray gun for a horizontal spray pattern. This is the best way to spray the legs or any vertical timbers on your project. Make two passes on each leg in this manner. Shoot at an angle, so you’re actually aiming at a long vertical corner of the leg. This will swiftly apply finish to two adjacent surfaces of the leg. Your next pass will cover the other two faces of that leg. This way, you’ll proceed quickly, and minimize the chance of runs or sags in the wood finish. Make sure your pressure regulator is set to 26 psi for optimal performance. Coat all four legs this way, before proceeding to the next step.
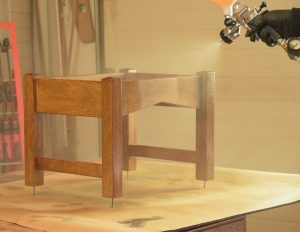 The Money Shot.
To finish things up, coat the rails in two passes. One should be angled down slightly to cover the top edge of the rail. The other coat should be angled up slightly to get good coverage on the bottom of the rail. Try to cover more than half of the rail with each pass. Work lights placed at a low raking angle will help illuminate your work. You really need to see the sheen of the wood finish as it’s being laid down. Otherwise, you’re just guessing that it looks right.
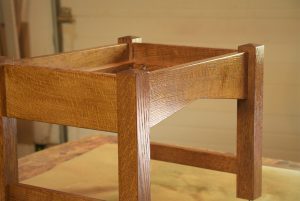 The Sheen Says It All.
Here the sheen of the second coat of shellac tells me the wood finish sprayed well. I’m happy with the look of this project as the topcoat continues to dry. The final result will be a medium sheen with fairly low luster, which is usually appropriate for arts and crafts style furniture.